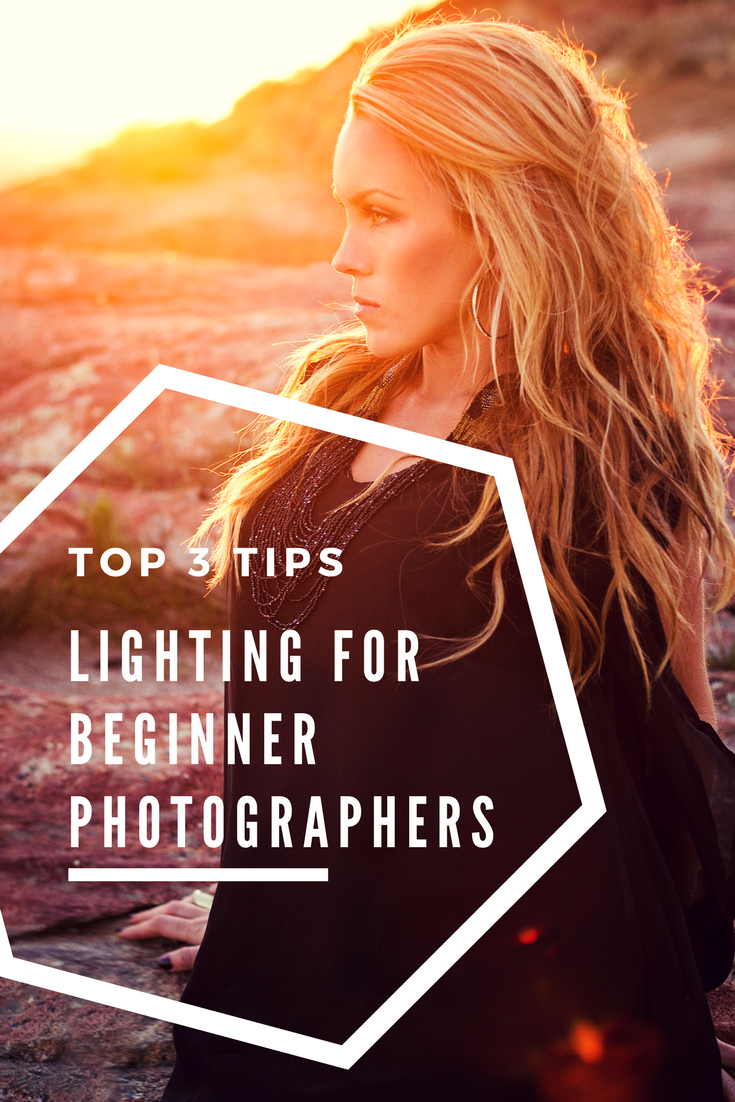
Three tips to help you understand outdoor lighting for photography:
You pick up your camera, walk outside in bright sunny afternoon light and click away. However, the back of your camera isn’t looking like what you had imagined…so what went wrong? Let me help! I have 3 lighting tips for beginner photographers (plus 2 bonus tips!) that will help you understand your light!
Lighting Tip #1: Temperature of Light (aka warmer = better)
If you have ever heard a photographer ramble on about ‘golden hour’ it’s for a reason. Golden hour is 2 hours before sunset (and 2 after hours after sunrise). The sun in low in the sky, making it soft and it’s warm light it casts is perfect for any skin tone.
Morning light is also soft and beautiful, but tends to be a lot ‘colder’ (more blue tones than yellow).
Lighting Tip #2: Direction of Light
The direction of light is in relation to your subject, where is your light source coming from? Generally speaking, when it comes to outdoor natural light photography you want your light coming from three places; front light, side light and back light.
A good tip to finding where your light source is coming from is to stick your hand out, with palm facing you, and see how the light and shadows fall. If your whole palm is in shadow its back lit, if there is broken light across the hand (mix of light and shadow) you are probably side lit. Finally, if your palm is all bright and no shadows you are front lit.
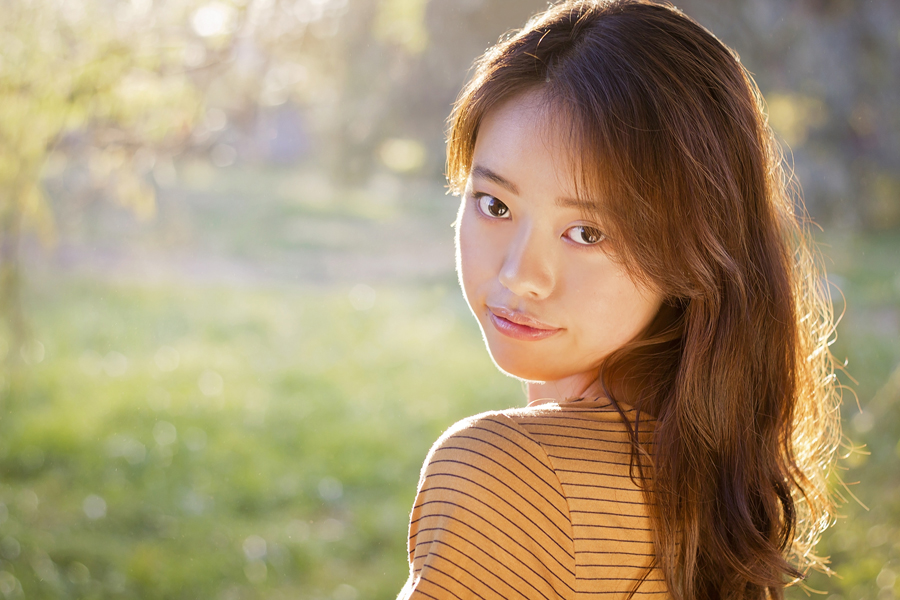
The best lighting usually is during golden hour and when your subject is back lit. The worst lighting is in the afternoon with front lighting (harsh unflattering shadows).
Here is an example of a back lit portrait I took during golden hour:
Lighting Tip #3: Quality of Light (aka the size of the light)
The bigger the light source the softer and more flattering the light is going to be. Think about the sun, that’s why it’s so attractive to so many photographers because it’s naturally a huge and soft light source to photograph people in.
Then the opposite of that is a flashlight where the light source is much smaller and therefore much harsher. Or if in object is blocking the light (like a building) it can slice up your light and create harsh shadows as well. Sometimes it’s a cool effect, but it needs to be intentional.
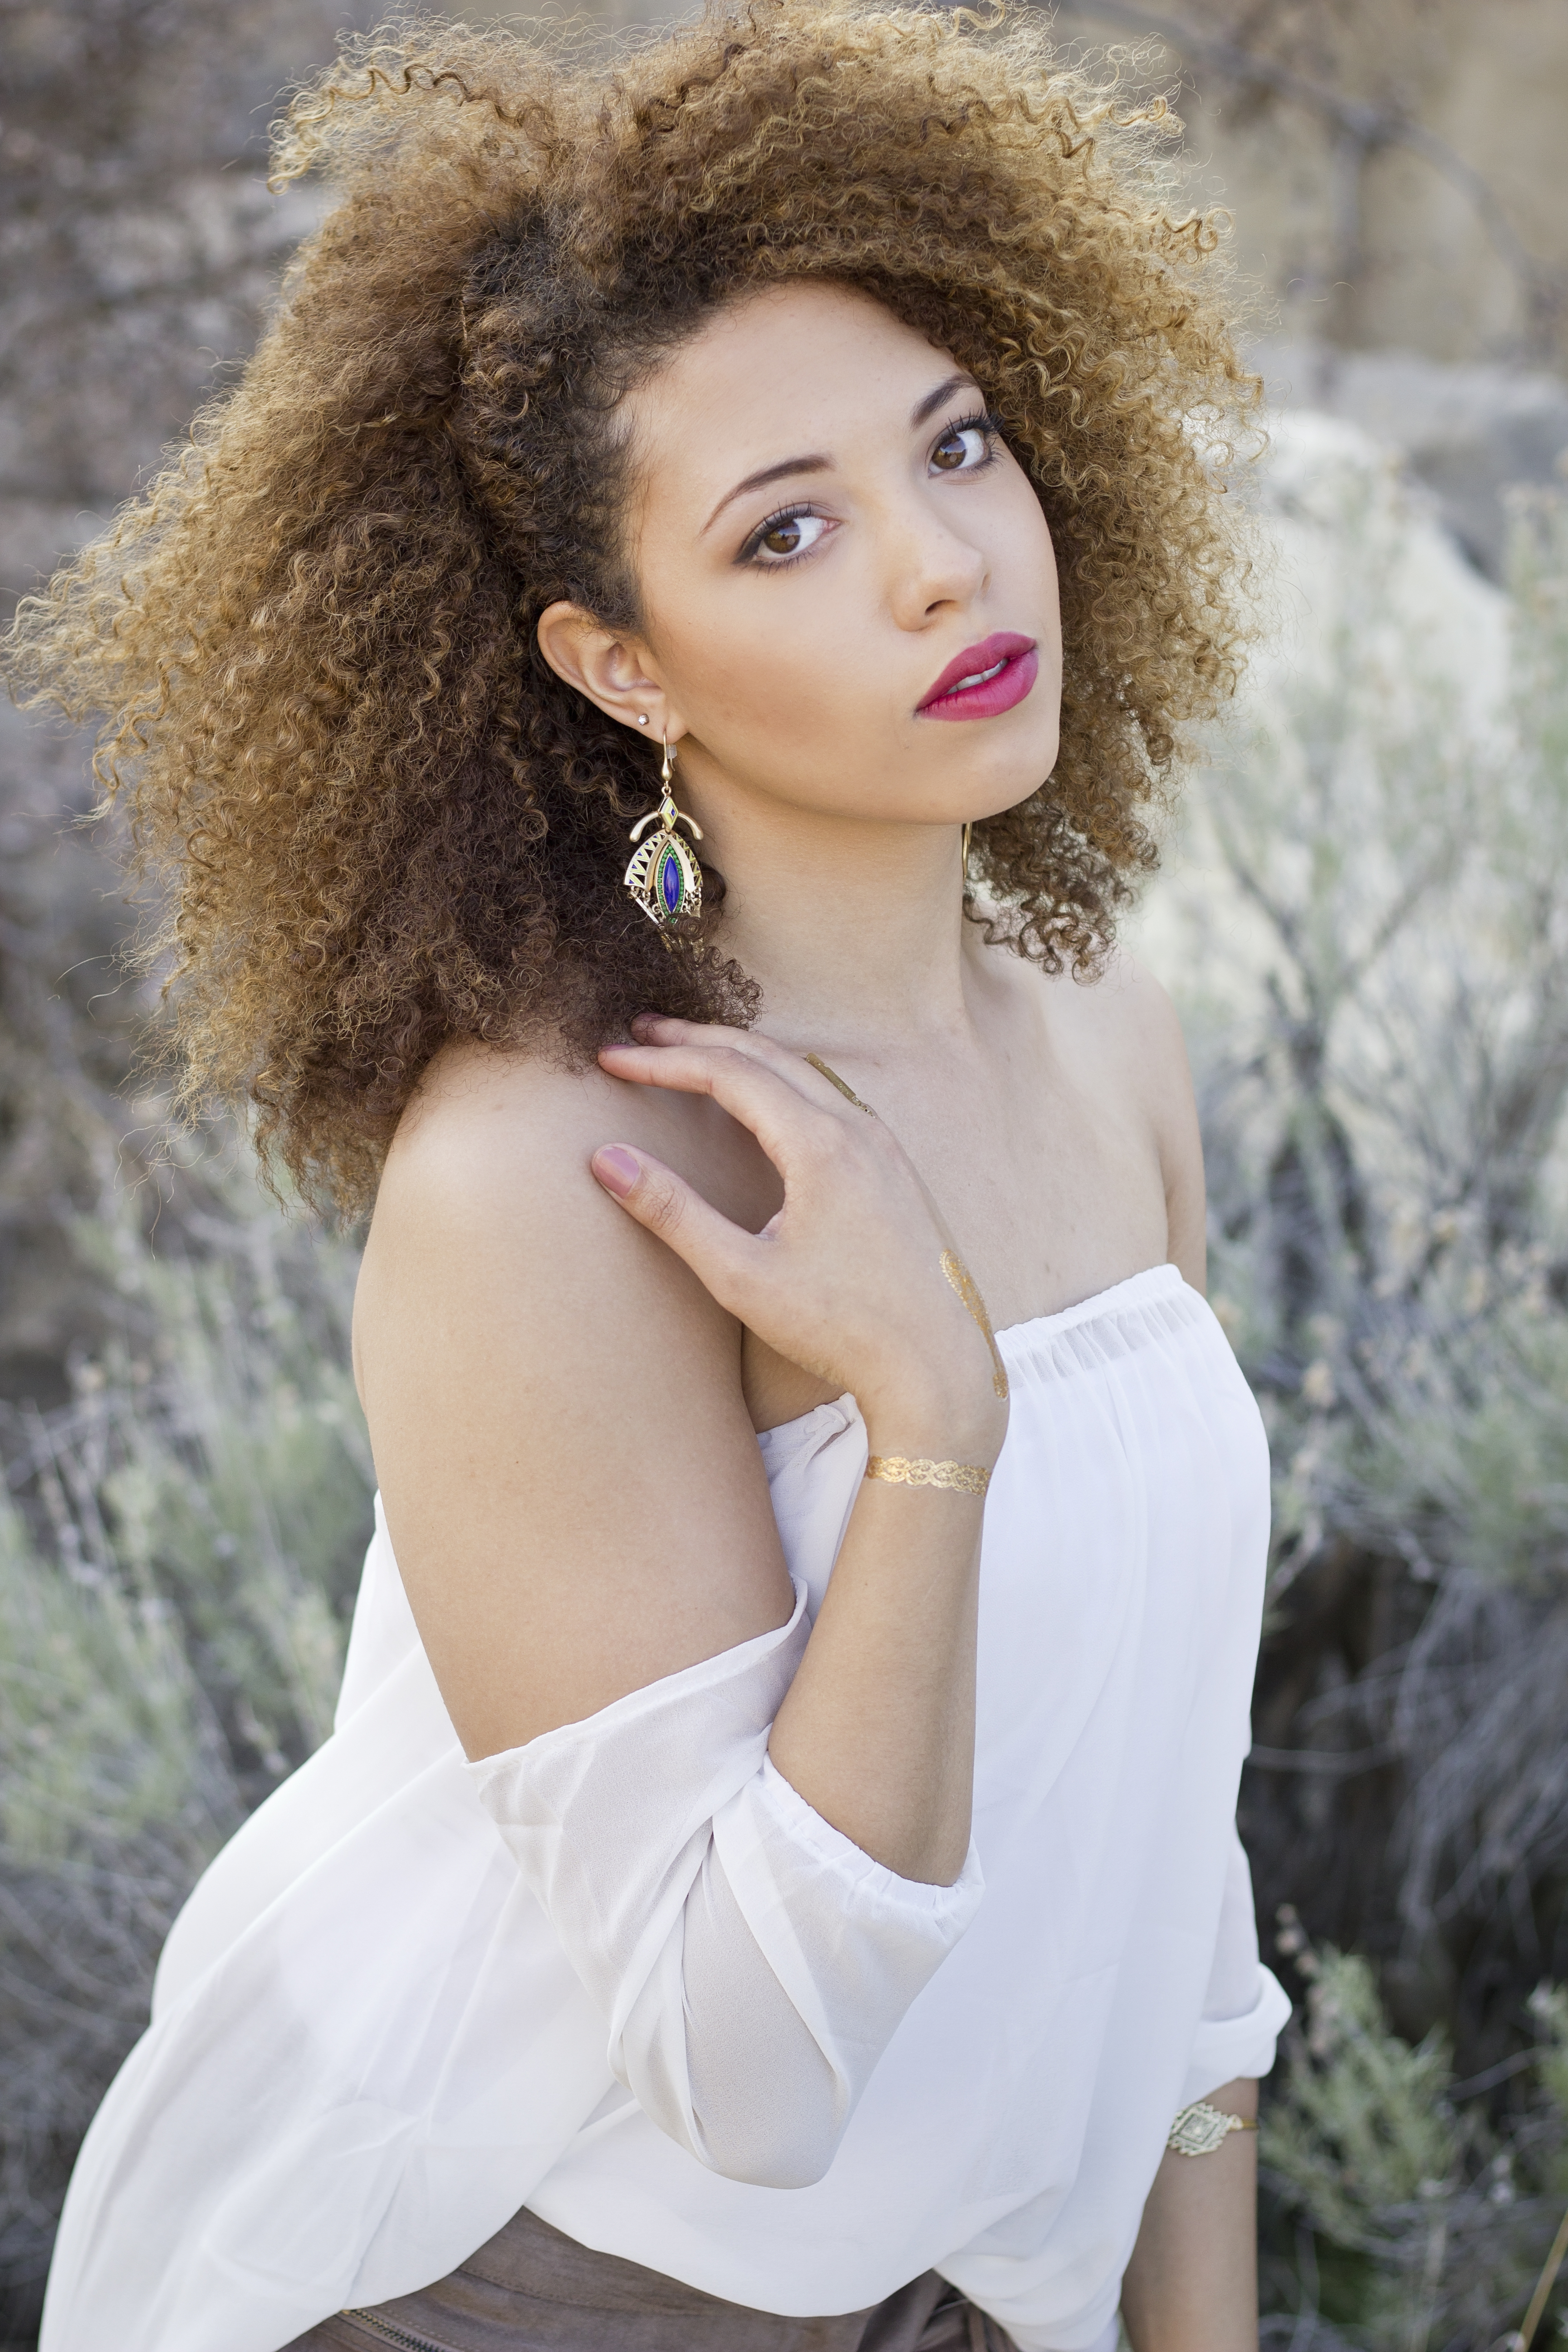
Bonus Lighting Tip #1: Get Your Subject In Shade
If you have to photograph in the afternoon or less than ideal light, my biggest tip is to get your subject in full shade. This eliminates that worry of direction and quality of light, all you have to mindful now is the temperature of light. Putting your subject in shade will cause the light to be ‘cooler’ because you are taking away the warm light of the sun.
Here is an example of a portrait I took while the subject was in full shade:
Bonus Lighting Tip #2: Invest in a Reflector
If you have the means to start adding to your camera gear, my next recommendation is to buy a reflector. This tool allows you to fill in shadows of your subject and help bring back that catchlight in their eyes that is so crucial for the subject feeling real and alive.
Here is a video going over all these points:
If you have gotten all the way through this Blog Post I want to reward you by giving you a FREE Lighting Checklist to help you plan out your perfect location and time of day for your next photoshoot. Get it here!


PLEASE COMMENT BELOW